
Climbing in the gym is fairly simple. Rent a pair of shoes, pay the entrance fee, and start climbing. When bouldering outside it’s good to have some extra gear with you. Like a bouldering pad.
Besides your favorite pair of rock climbing shoes, the most important equipment to have at the crag when bouldering is a Bouldering pad, aka Crashpad. If you fall while sport climbing, the rope will catch you. When bouldering, it’s the crashpad that will cushion your fall.
The crashpad is also one of the most expensive pieces of gear to buy when making the transition from the gym to crag. HERE is an article of all the gear you need for bouldering outside. And HERE is an article on how to make the transition.
History of the crashpad
When bouldering was invented, it was merely an activity to keep you fit and train for the mountains. Climbing on such ”small” pieces of rock was somehow embarrassing. At least compared to climbing in the mountains.
Usually, a boulderer in the ’80s would lay a small piece of cloth, possibly a towel, on the ground to wipe the sole of his or her climbing shoes, then step on the rock and start bouldering. Falling was not pleasant. It was preferred not to fall at all.
The bravest and strongest of boulderers were climbing higher off the ground, risking a possible injury in case of a bad fall. As the problems got harder, climbers were thinking of ways to even out the landings to make falling safer. Thick branches or pieces of wood were used to even out the rocks on the fall-zone.
The invention of the V-scale
In the ’90s, two hard-core boulderers manufactured one of the first bouldering mats for their personal use. After initial interest in their invention, John ”Verm” Sherman (also the inventor of the ”V-scale” grading system) and Bruce Pottenger started manufacturing the first commercial bouldering pad, the Sketch Pad.
The invention of the crashpad made bouldering safer and therefore more popular among climbers.
Since then, several different manufacturers have started manufacturing crashpads. Nowadays, there are probably a hundred different bouldering pads on the market. Picking one can be quite confusing.
Let’s look at some of the key features to help you navigate through the bunch.
Crashpad construction
A crash pad consists of three key elements. These are the foam inside the pad, the fabric used on the outside, and the carrying system.
The foam
Typically crash pads use two different types of foam with different densities that absorb the impact of the fall: a thin layer of closed-cell foam on top of a thicker layer of open-cell foam. Stiff foam on top of softer foam results in better absorption of impact and in some cases gives a softer catch.
A soft catch is not necessarily a good thing when it comes to bouldering pads. The pad should be stiff and feel quite firm. Firm or even hard pads are better for absorbing the force on falls from higher up. A crashpad is designed for keeping you from getting injured, not for feeling nice and comfortable relaxing.

The price of the pad is a good indication of the quality of foam used inside the pad. High-quality foam is rarely found inside the cheapest pad.
When new, a bouldering pad with cheaper foam might feel similar to one with high-quality foam. The difference between the two comes more noticeable the more you fall on the pads. The high-quality foam inside the crash pad will keep it’s cushioning properties fall after fall, year after year. A cheap foam will not. It might even be completely unusable after just a year or two.
The fabric
Crashpads are under a lot of stress. Think about it: you are always dragging them around on dirt and sharp rocks, throwing them off of rocks, falling on them from high up, shielding you from sharp branches and so on.
The quality and durability of the fabric used on the shell are one of the more important features that help the pad last you a long time. Usually, manufacturers rely on tough nylon (1000 denier or even 1680 ballistics) nylon) or Cordura. One can debate the differences between the two, but the point is that the fabric should be as tough as possible.
Stay away from crashpads with shells (the outer fabric of the pad that takes the most hits) feeling like plastic or thin and fragile. Chances are that they won’t last.
The carrying system
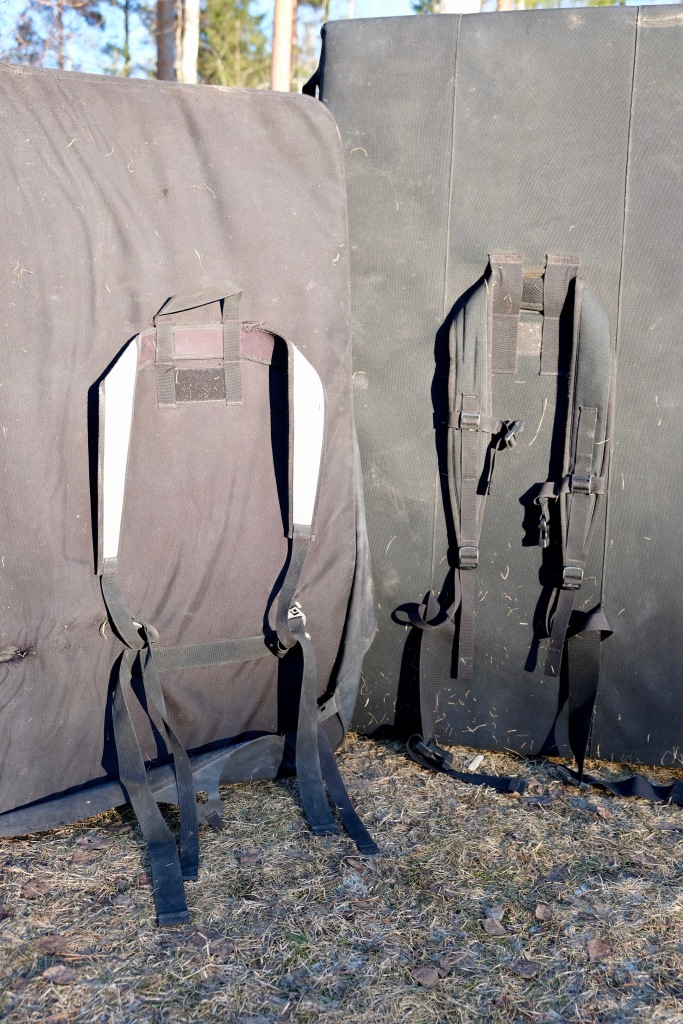
The carrying system can be an important feature as well, especially if you plan on taking your bouldering pad on adventures with long approaches.
Most pads nowadays have invested in the design of the carrying system. The best pads have generously padded haul straps that are dialable for every body type. The waist belt is usually fixed but the shoulder straps are movable to accommodate the length of the carriers back. A strap that goes over the chest is a nice feature as well.
Look for an all-round sturdy appearance and feel and nice padding on the areas where the most pressure is generated.
On long approaches, a slight lack of comfort can become unbearable towards the end of the hike. Again, shy away from flimsy, thin-looking straps.
Folding systems
One of the most important features of a bouldering crash pad is the folding system. Most pads can be divided into three categories based on the way they fold up: Taco, Hinge, and Hybrid.
The Taco
A taco-style pad, like the Black Diamond Drop Zone, has a continuous piece of foam without any hinges in the middle. The advantages of a taco-style pad are that there are no hinges. This means that there are no empty spots on the fall zone, were to sprain an ankle, and fewer possibilities for a rock to penetrate the pad. A taco pad is also handy when you want to carry a bunch of gear inside the pad.
Downsides of a taco pad are that they take up more space and that they hardly ever lay flat on the ground. They are also bulkier when transported compared to other models. Taco-style pads are meant to be opened up or stored flat. Storing the pad without opening it up can stress the foam and shorten its lifespan.
The Hinge
Many manufacturers have come up with their way to hinge a crash pad. Some pads, like the Black Diamond Impact, have a straight hinge. The major downside of this type of hinge is that it creates an empty, uncushioned area of impact, especially on uneven ground. It is also possible that if you land on the hinge, the pad can fold upon you, just like a bear trap. I for one, have landed on the hinge on uneven terrain and sprained my ankle pretty bad. Unpleasant.
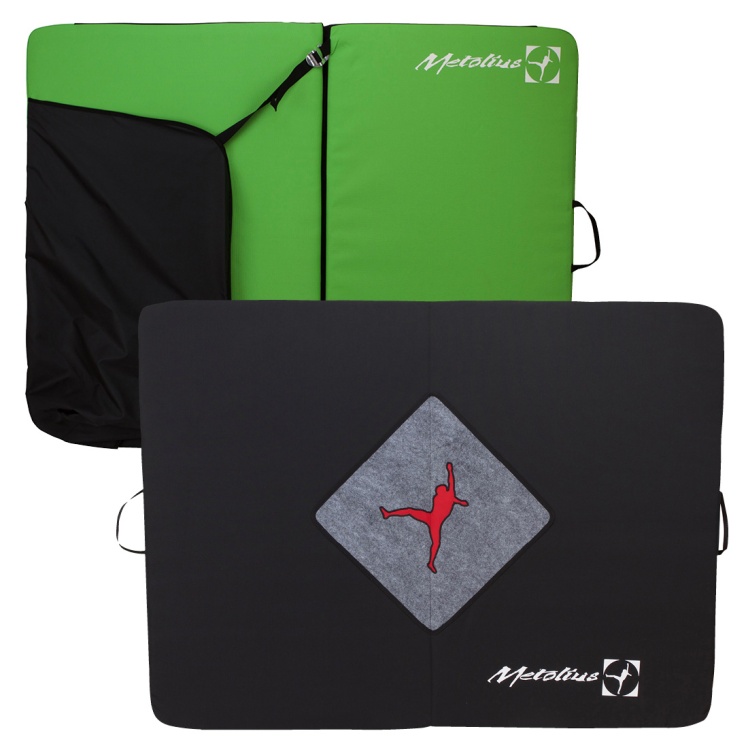
Some pads, like the Metolius Session II, have an angled hinge. This is an attempt to eliminate the possibility of landing on an” empty” spot when landing on the hinge since it is less likely to fold upon you. A nice and simple attempt to fix the problem.
The pros of hinged pads are that they lay flat on the ground when opened and that they fold up nicely when stored. The downside of the hinge system is the lack of continuous padding, with possible empty spots to land on.

The Hybrid
The hybrid hinge has the best of both worlds. The Organic Full pad is a typical example of a hybrid hinge. This style of pad has a continuous piece of dense foam on the top part. Under the continuous foam layer is the thicker part of foam, with a hinge in the middle. If falling on the hinge of a hybrid style pad, you still have the dense closed-cell foam to protect you. Hybrid hinged pads still can buckle up on you when falling directly on the hinge, but not so badly as regular hinged pads.
Hybrid hinged pads also pack up nicely and take up less space when stored. I recommend opening up hybrid hinged pads for storage as well, but it isn’t that critical.

Pad sizes
There are two things to take into consideration when talking about the size of the crash pad: the size of the landing area and the thickness of the pad.
Thickness
Let’s talk about the thickness of the pad first. Thicker pads are heavier to carry with you but they have a lot more impact resistance when taking a big fall. A one-centimeter difference in thickness might not be a big deal but 2,5 centimeters or an inch is noticeably different to fall on. I recommend going as thick as possible if you like climbing high-balls, or tall boulders.
Choose a thickness you can comfortably carry on your own. I prefer carrying multiple pads, just to be safe. I usually carry one big pad and one standard size pad to the crag.
Size
The size of the pad is mostly a decision based on how much money you want to spend on your crash pad. Also, consider the vehicle used to transport the pad to the crag.
If you usually take public transportation to go climbing, a huge pad might be a bit inconvenient 😉 Sometimes it might be easier carrying two smaller pads than one BIG crashpad. It is also a good idea to make sure the pad fits inside your car.
Pads are generally divided into three groups: big pads, standard pads, and small pads (satellite pads).
Big pads have the biggest landing area. The shape of the pad is almost as important as the size itself. One of the most popular big pads, the Black Diamond Mondo, is shaped like a rectangle. My personal favorite, the Organic Big Pad is, shaped more like a square. Probably just a matter of preference, but I do have to say, that the Mondo fits in a standard-sized car more nicely than the Organic equivalent.
Small pads are great sit start pads and good at covering edges and gaps. They are also nice to fill in the empty spaces under the bigger pads on un-even landings. Typically small pads are used in the company of other pads.

Smaller bouldering pads tend to be thinner, so I can not recommend them as being the only pad used when bouldering.
Slider pads are also used within the company of other pads. They are used to create a continuous landing area by covering the edges and gaps. Slider pads are commonly manufactured using a single layer of high-density foam.
Keep in mind that even with the biggest pad on the market might not make falling any safer, if it placed incorrectly. HERE you can find more info about pad placement and spotting.
Price?
A lot of times the price of the crashpad is an indication of quality and durability. I wouldn’t hurry when buying a pad. Save up a few extra bucks and buy a higher quality pad that will last you for years. The price difference between a cheap pad and a better pad is not that big.
Smaller pads cost around 50-100$, standard pads around 100-150$, and big pads around 190-300$.
Should I have more than one crash pad?
Preferably yes. I hate missing the pads when falling. That’s why I climb with multiple pads.
First, buy one you are comfortable climbing with, then add up later if you feel like it. Multiple pads are always safer than just one.
A cost-efficient way to have multiple pads in the landing area is to find friends to climb with, who also own pads 😉

Final advice
Buy a quality crashpad that will last you for years.
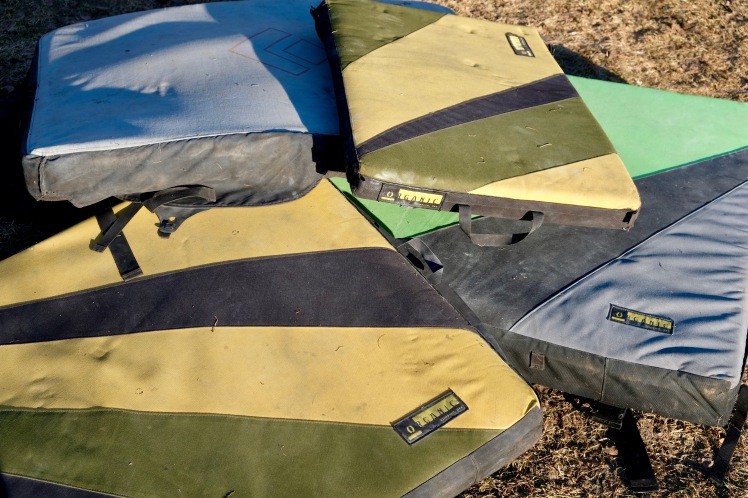
My favorite crash pad manufacturer at the moment is Organic Climbing. I have had their products for years and have fallen on their pads a lot. And I mean ALOT. As a matter of fact, I wish I had fallen on them less and succeeded more often;)
Anyway, all my Organic pads are still firm and almost like new. Only dirtier 😉
There are also many other quality brands on the market, too. Go and try them out at your local gear shop or climbing gym. It’s also a good idea to ask around and find out what more experienced climbers think of different brands.
Any questions or comments? Leave them in the box below. I’ll be sure to get back to you.
Now, go out and climb. Because climbing is awesome!
Related articles:
Etiquette for climbing outdoors
